Laboratory
The Capabilities of Steel Testing Lab
Steel Testing Laboratory performs a wide range of chemical and mechanical testing to ensure that customers are in possession of the data necessary to meet their application’s needs. Our testing equipment is precisely calibrated on a daily basis and all tests are performed by a team of highly trained technicians. Whether your needs are low or high volume, you can be confident that your tests are being performed with expertise, experience, and an unwavering eye for detail. We are able to provide prompt results, typically within 24 hours of receiving your sample, and offer expeditious service by overnight courier and local pick-up.
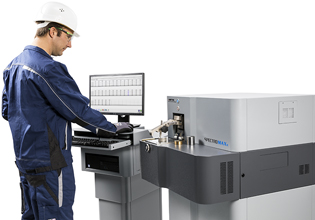
SPECTROMAXx (Metal Analyzer)
The SPECTROMAXx stationary metal analyzer is used mainly for material testing in foundries and for incoming and outgoing inspections in the metal industry around the world. It determines all of the elements used in the metal industry, including metal analysis of carbon, phosphorous and sulfur.
Material/Properties measured/Method:
Aluminum Steel: Al, Cr, Cu, Fe, Mg, Mn, Si, Ti & Zn per ASTM B209M-14.
Carbon & Low Alloy Steel: Al, B, C, Cr, Cu, Fe, Mn, Mo, Nb, Ni, P, S per ASTM E415.
Stainless Steel: C, Cr, Mn, Mo, N, Ni, P, S & Si per ASTM A276/A276M.
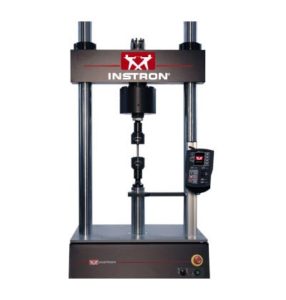
INSTRON (YTE results)
The INSTRON device specializes in running a tensile, also known as a tension, test. This product also develops the yielding tensile elongation results. When properly conducting the tension test, it will inform the tester the strength of the product being tested, how long the width of the sample will extend before splitting in half, and it will help to determine what the material will yield and tensile strength.
Thickness minimum: 0.015 in. Thickness maximum: 0.320 in.
Material/Properties measured/Method:
Carbon & Low Alloy Steel: Flat-Metals, Tensile, r-Value, n-Value, E8, GMW2 (GM6409m), GMW 3032, GMW 3399, JIS Z2201-98 Z2241-98, ASTM E8 (Section 6.3), E517, and ASTM E646.
Flat/Unfabricated Steel: Yield, Tensile, Elongation, r-Value, n-Value, Ductility per ASTM A370, E8, GMW 3032, GMW2, GMW3399, JIS Z2201-98 Z2241-98, E517, ASTME646, and ASTM E643.
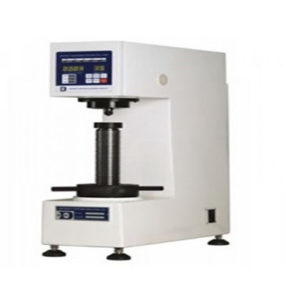
Brinell SUN-TEC (Hardness Test Method)
The Brinell Sun-Tec Hardness Test Method was specifically created to specialize in testing the hardness of steel. It is used as a substitute device when the materials that are being tested are either coarse or have a surface that may be considered rougher compared to others. Data collection gathered by this instrument is done by using a carbite indenter that is carefully pressed against the material under a certain amount force. The force that is pushed against the material is deepened upon the actual hardness of the steel. Once the indentation has taken place in the steel, it is quickly measured and the Brinell measurements are based off the diameter. The data that is gathered from the measurements are then processed in the BHN formula and the results are guaranteed to be accurate.
Rockwell Hardness: B, C, T15, T30, T45 & F per ASTM E18 on Carbon and Low Ally Steel, as well as, Flat/Unfabricated Steel.
Weight Mass of Coating
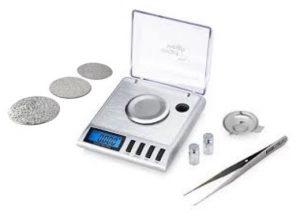
Determining the weight of coating for comparison with specification requirements. A coating of zinc on iron or steel articles provides protection against corrosion. As the protection is provided by sacrificial loss of zinc, the degree of protection is proportional to the weight of zinc coating. Specifications for zinc-coated articles frequently provide for different classes of coating so that the purchaser can select the coating weight most suitable to her/his needs.
Coated material thickness minimum: 0.025 in. Coated material thickness maximum: 0.110 in.
Method: ASTM A90.
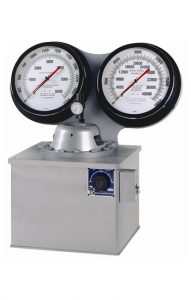
Double Olsen (Test Ductility)
A cupping test made on an Olsen machine helps to determine ductility and deep drawing properties. The test simulates a deep drawing operation and is continued until the cup is formed from the steel sample fractures. Ductility and drawing properties are judged by the position of the break, depth of the cup, condition of the surface after the break, etc.
Ductility per ASTM E643 (2000).
Double Olsen Coating Adhesion per Chrysler LP-461H-120.
